Stylized Color Grading Post Effect
Stylized Color Grading Post Effect Brief Overview
The Stylized Color Grading includes the essence of the color correction processing — it is narrowed down for the anime-looking picture creation. Each of the parameters like Blue Shadows, Green Shadows and Red Highlights seem to be complicated in a designer work field, but in Stylized Color Grading each of them were made to be working by their own formula tailored for the animation film stylistic look. Using a simplistically looking parameter slider you operate with an array of fairly sophisticated processing under the hood, which makes it very easy to use.
Stylized Detail Post Effect interface
Beginning to Work with Stylized Color Grading Post Effect
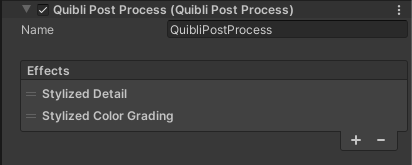
STEP 1. The Stylized Detail effect has to be added to the currently used Forward Renderer as a Renderer Feature. The Renderer Feature is called Quibli Post Process and includes Stylized Color Grading and Stylized Detail described here in the Before Post Processing and After Post Processing sections. The steps are below.
Stylized Post Effects Renderer Features loaded in Forward Renderer.
- Locate the currently active Forward Renderer. It can be done in a few ways. One of them is to look at your camera’s Inspector panel ▶ Forward Renderer field. Search for this Forward Renderer, select it and look at the Inspector panel;
- Click Add Renderer Feature;
- Locate the Quibli Post Process item in the menu. Select it;
- In the Effects part of the Quibli Post Process, please, click the ‘+’ button and select Stylized Color Grading in the drop down menu.
STEP 2. After STEP 1 above is completed, as the Stylized Color Grading effect is a Volume Override created to be used in the Volume component of the camera, it should be added as a part of the post-processing onto the camera. The steps are below.
- Select a camera;
- Press Add Component on the bottom of Inspector panel;
- Type Volume in the search box, or locate it manually in Miscellaneous ▶ Volume, click on it once found;
- Click Add Override in the Volume;
- Select Quibli ▶ Stylized Color Grading.
Stylized Color Grading effect is ready to be used now.
In the Demo Scenes everything has already been set up and are ready to be used. Once you set up Quibli as described in the installation guide, all the Forward Renderers, Renderer Features and Volume Overrides are already installed and configured.
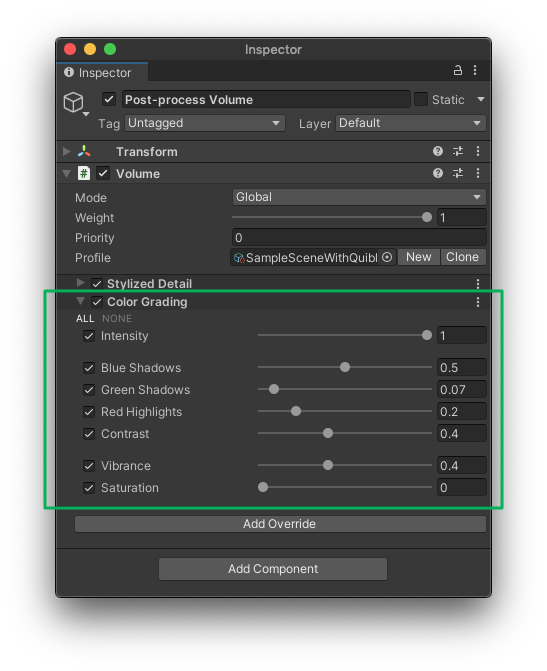
Parameters of Stylized Color Grading Post Effect
- Intensity Defines how strong the effect is;
- Blue Shadows Raises up the ‘darks’ of the blue channel of the image using a quadratic function;
- Green Shadows Raises up the ‘darks’ of the green channel of the image using a quadratic function;
- Red Highlights Adds a positive ‘bump’ in the ‘lights’ of the red channel;
- Contrast Increases the color difference of the image;
- Vibrance Makes colors more vivid. Works in a more subtle way than Saturation;
- Saturation Makes colors more vivid.
Comments