Curve Renderer
Curve Renderer Brief Overview
Electric wires seem to be the Thing in Japan. We made a tool that makes wires in your scene. You’ll need to have two points distanced somewhere over the scene, and the renderer will generate a wire (or multiple wires at once) for you. Between these two points you can have either one or as many wires as you’d like, with or without curvature and width seeded-random variation.
Of course, Curve Renderer can be used not only for generating the wires. Its core function is to make curves render them as meshes.
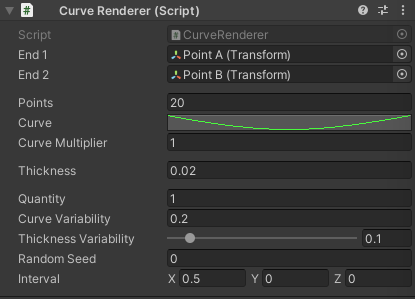
Curve Renderer interface
Examples of Curve Renderer Usage
A good place to look at Curve Renderer in action is to load the included City demo scene. This scene has many groups of A and B points, which are used to generate a web of wires. Once you locate the Wires Game Object (folder) in the Hierarchy panel, inside Scenery Game Object (folder), please, select it and look at the Inspector panel, you’ll find all the parameters for adjusting the look of the wires.
Beginning to Work with Curve Renderer
- Create an empty Game Object: right-click in the empty space in the Hierarchy panel ▶︎ select and click Create Empty Name it, for example, ‘Curve Renderer Container’;
- Create two more empty Game Objects, name them, for example, ‘Point A’ and ‘Point B’;
- [Optional] Nest the last two Game Objects (‘Point A’ and ‘Point B’) into ‘Curve Renderer Container — select the game objects and drag them onto the ‘Curve Renderer Container’. This will make the ‘Curve Renderer Container’ a parent of ‘Point A’ and ‘Point B’;
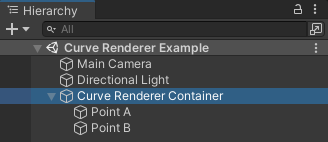
Curve Renderer and two end points hierarchy - Select the ‘Curve Renderer Container’ Game Object;
- In the Inspector panel, click Add Component;
- Search for ‘Curve Renderer’, or locate it manually under Scripts ▶︎ Dustyroom ▶︎ Curve Renderer. Click on it once found.
- It is ready to be tweaked.
Loading the Curve Renderer script also automatically creates the Mesh Renderer.
Parameters of the Curve Renderer
- End 1 The first of the two points needed to stretch the curve between. A simple empty Game Object is suitable for this — you need these to be able to conveniently place and adjust their location in the scene. Once you drag your End points to the End 1 and End 2 slots in the Inspector panel of the Curve Renderer, the script will take care of the positioning of your curve.
- End 2 The second of the two points needed to stretch the curve between.
- Points Defines the resolution of the curve. The more points you set, the smoother the curve will be. And vice versa, the lower the value, the more low-res the curve will be (which is sometimes a deliberate thing to do).
Increasing and decreasing the number of points increases and decreases the curve resolution
- Curve Opens the curve editor in which you can form an approximation of the actual generated curve. You can add and remove points, change the steepness of the curvature by clicking on the points and adjusting their handles. Right-click → Add Key or left double-click anywhere on the line adds a point, right-click → Remove Key deletes a point. It is possible to scroll over the editor to zoom in for finer adjustments and zoom out for making the curve larger. There are presets of the the curve shapes, which can be loaded and adjusted.

Curve editor, which opens up once you click on the ‘Curve’ parameter
- Curve Multiplier The number which the Curve values are multiplied by. This can be helpful to make the curve larger or smaller without the need for opening and changing the parameters in the Curve editor.
- Thickness Defines the radius of the cross section of the curve in its rendered state.
- Quantity How many curves to generate from a single pair of End points (End 1 and End 2). If you set Quantity to more than ‘1’, you will have multiple curves generated by one instance of the Curve Renderer script.
- Curve Variability Using this parameter you can introduce some randomness into the positioning of the generated part of the curve — while the End points remain their positions, the rendered curvature can have some deviation from the set-up earlier Curve parameter. For example, if you take a bunch of wires of a similar length, attach their ends to the poles and let them hang, some of them will be closer to the ground, some will be less stretched.
- Thickness Variability Sets the range for the deviation from the Thickness parameter. Can be useful if you set Quantity to more than ‘1’ and would like to add variation to the width of each of the curves.
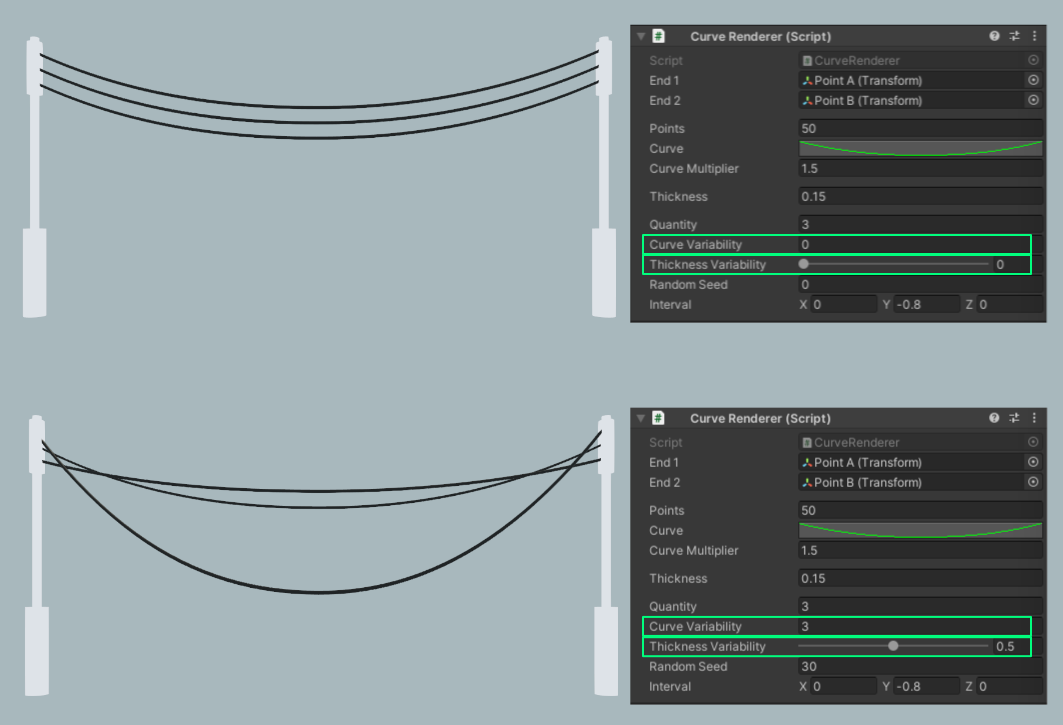
Curve Renderer variability parameters bypassed and engaged. On the upper example there is no variability. On the lower example you can see that both _Curve Variability_ and _Thickness Variability are used, as well as the _Random Seed_. The _Quantity_ is set to ‘3’
- Random Seed Changes and remembers the seed of the randomness for the deviation parameters, such as Curve Variability and Thickness Variability.
When you change the seed of the randomness (variation), it is fixed so that once you have a good seed, it won’t change upon the scene restart.
- Interval If you set Quantity to more than ‘1’, each of the additionally generated curves can be linearly spread away from each other along X, Y and Z axis. The base points from where the translation occurs are the positions of the End 1 and End 2 Game Objects.
Working with the Curve Renderer After Loading
When you have at least one container with pair of the points set up, please, launch the scene (press Play) to generate the curves between these points. Once the curve is generated, there is no need for launching the scene again to update the parameters. The launching is needed when you move the End points.
Applying Materials
As it was mentioned earlier, once you load the Curve Renderer, a Unity Mesh Renderer is created, too. In this Mesh Renderer you can find a Materials part, which lets you choose the material for the generated mesh. A simple lit shader will do.
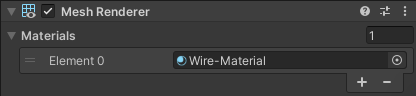
Material slot in the Mesh Renderer
Editing the Curve Renderer Afterwards
As the exported mesh is not cut in stone, you can always get back to any of the Game Object containers carrying the Curve Renderer and tweak the parameters.
You can duplicate the Game Object Containers, move the End points, press Play and you’ll quickly have another independent curve. This way it is easy to populate the scene with, for instance, wires.
Comments